How to dry hibiscus flowers for tea is simpler than most people expect — and doing it at home gives you fresher, more flavorful, and more potent hibiscus tea than most store-bought dried versions. Whether you grow hibiscus in your garden or buy fresh flowers at a market, this guide covers every method: air drying, oven drying, and food dehydrator drying. You’ll also find harvesting tips, storage guidance, and exactly how to turn your dried calyces into a perfect cup of tea.
Which Part of the Hibiscus Plant Do You Dry for Tea?
Before learning how to dry hibiscus flowers for tea, it’s important to clarify exactly which part of the plant you’re working with — because this is where most beginners go wrong.
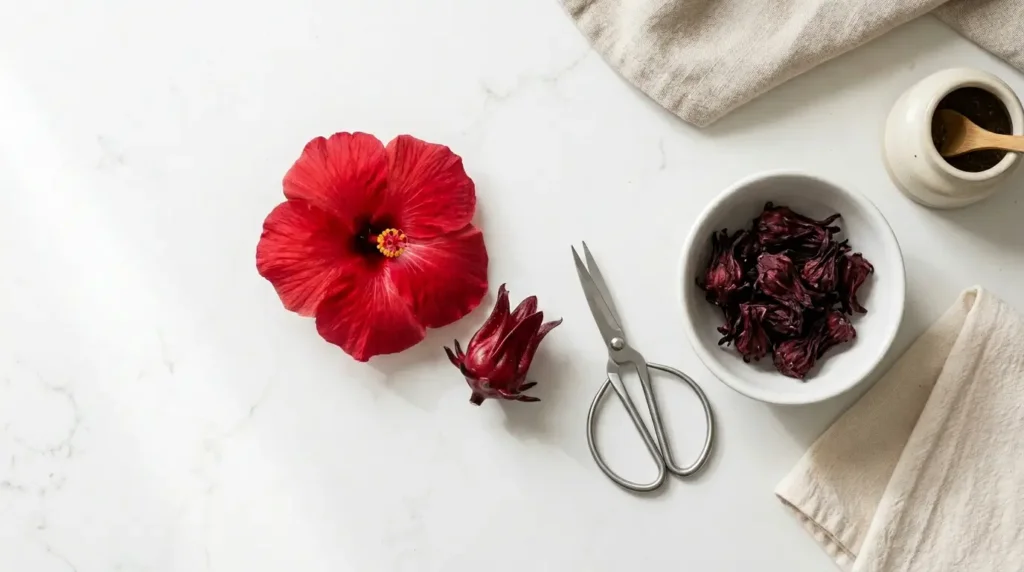
You dry the calyx, not the petals.
The calyx is the fleshy, dark-red, cup-shaped structure at the base of the hibiscus flower — it surrounds and protects the seed pod. When the flower blooms and the petals fall off naturally, the calyx remains attached to the stem and swells into a tart, juicy structure. This is the part commercially sold as “dried hibiscus” or “flor de jamaica.”
The petals of the hibiscus flower are edible and have a mild flavor, but they are not what gives hibiscus tea its signature deep red color, tartness, or health benefits. The anthocyanins, organic acids, and antioxidants that make hibiscus tea what it is are concentrated in the calyx.
How to identify the calyx:
- It is the star-shaped, fleshy structure at the base of the flower
- Deep red to burgundy in color on Hibiscus sabdariffa (the tea variety)
- It feels slightly juicy and firm when fresh
- It tastes sharply tart even when raw
Important: Make sure you are working with Hibiscus sabdariffa — the roselle variety specifically grown for culinary and tea use. Ornamental hibiscus varieties (Hibiscus rosa-sinensis, the common garden hibiscus) are not toxic but have a much milder flavor and are not used for traditional hibiscus tea.
When to Harvest Hibiscus Calyces
Timing your harvest correctly makes a significant difference in the flavor intensity and antioxidant content of your dried hibiscus.
Harvest 3–4 weeks after the flower blooms. After the petals fall off naturally, the calyx continues to swell and develop for several weeks. The ideal harvest moment is when:
- The calyx is fully swollen and firm — not soft or beginning to shrivel
- The color is deep, vivid red throughout — not pale pink or beginning to brown
- The seed pod inside is still green and firm
- The calyx separates cleanly from the stem with a gentle twist or small cut
Harvest in the morning after any dew has evaporated, but before the heat of midday. This preserves the most volatile aromatic compounds and ensures the calyces are at their lowest natural moisture content before you begin drying.
How to separate the calyx: Use clean kitchen scissors or a small sharp knife. Cut the calyx away from the stem just below its base. Gently pull or cut away the green outer sepals if present. You can leave the seed pod inside during drying — it separates easily once the calyx is dry.
Method 1: Air Drying (No Equipment Needed)
Air drying is the traditional method used across Egypt, Sudan, Mexico, and West Africa. It requires no equipment, preserves flavor and color very well, and is completely free — but it takes the longest.
Print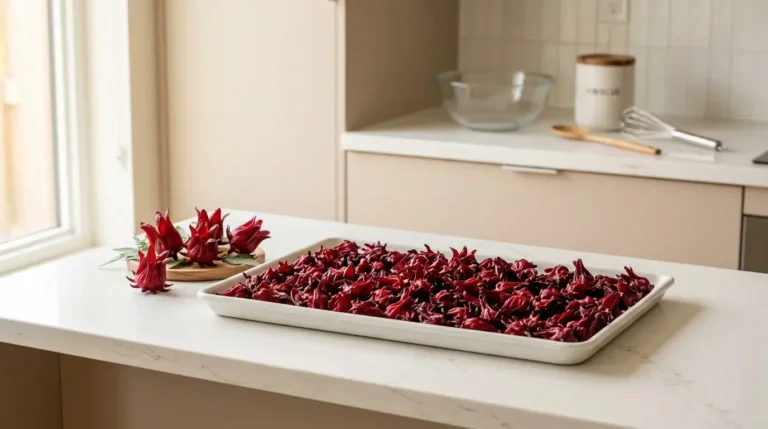
How to Dry Hibiscus Flowers for Tea: 3 Methods That Actually Work
Learn how to dry hibiscus calyces at home using air drying, oven, or food dehydrator. This step-by-step guide ensures perfectly dried hibiscus flowers with maximum color, flavor, and antioxidant potency — ready to brew into tea for up to 18 months.
- Total Time: 4 hours (oven) · 3–7 days (air dry)
- Yield: Approximately 75–100g dried calyces per 500g fresh
Ingredients
- Fresh hibiscus calyces (Hibiscus sabdariffa), harvested at peak ripeness
- Clean water for washing
Instructions
- Wash fresh calyces gently under cold water and pat completely dry
- Lay in a single layer on a mesh drying rack — no overlapping
- Place in a warm, ventilated spot away from direct sunlight
- Cover loosely with cheesecloth to protect from dust
- Turn once daily — check for dryness after 3–5 days
- Preheat oven to 50–60°C (120–140°F) — lowest setting
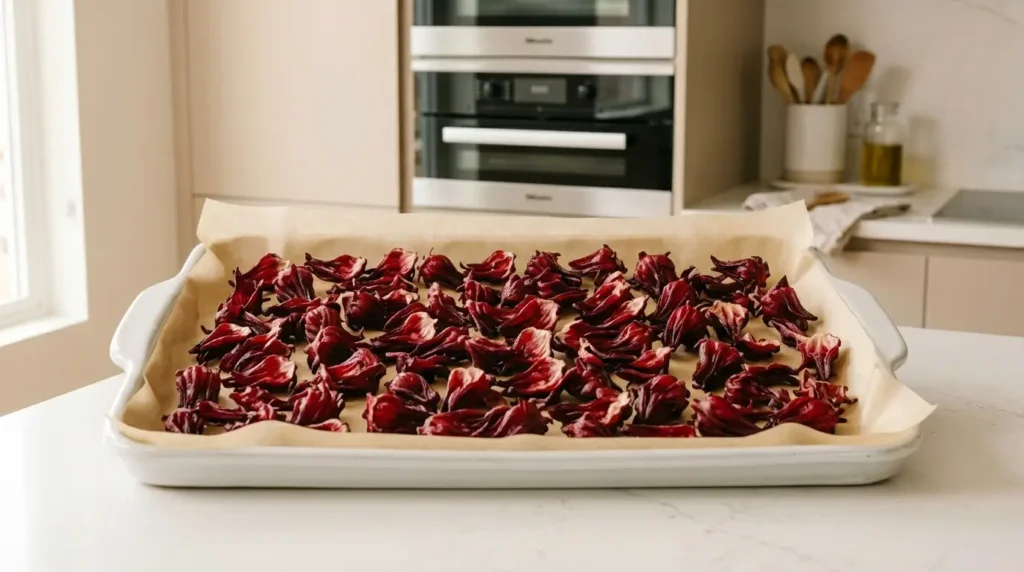
- Arrange washed calyces cut-side up on a parchment-lined baking sheet
- Place on middle rack and check every 30–45 minutes
- Turn halfway through — ready in 2–4 hours
- Arrange washed calyces in a single layer on dehydrator trays
- Set to 52–57°C (125–135°F) — herb or flower setting
- Run for 4–8 hours, checking every 2 hours
Notes
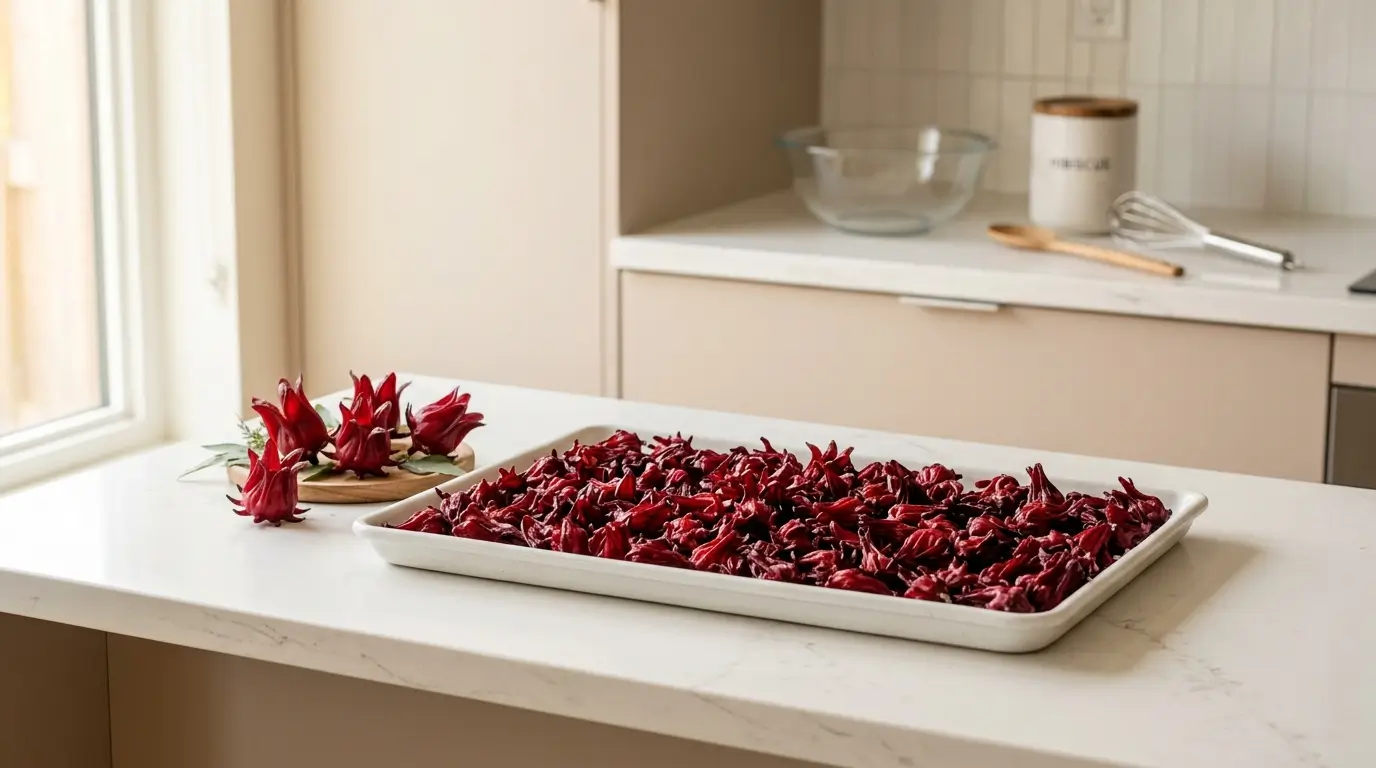
Ready when the calyces snap rather than bend — the snap test is the most reliable dryness check. Color should remain deep red to dark burgundy. Store in an airtight amber glass jar away from light and heat for 12–18 months shelf life. Never refrigerate — condensation causes mold.
- Prep Time: 10 minutes
- Cook Time: 4 hours (oven method) / 0 hours (air dry)
- Category: DIY / Drinks
- Method: Air drying, Oven, Dehydrator
- Cuisine: Universal
Nutrition
- Serving Size: 2 tsp dried (5g)
- Calories: 15 kcal
- Sugar: 0g
- Sodium: 2mg
- Fat: 0g
- Saturated Fat: 0g
- Unsaturated Fat: 0g
- Trans Fat: 0g
- Carbohydrates: 3g
- Fiber: 1g
- Protein: 0g
- Cholesterol: 0mg
Keywords: how to dry hibiscus flowers for tea, dried hibiscus calyces, homemade hibiscus tea, how to dry hibiscus, drying hibiscus at home
Best for: Small to medium batches · people without an oven or dehydrator · preserving maximum antioxidant content
What you need:
- Fresh hibiscus calyces, cleaned and dried of surface moisture
- A mesh drying rack, bamboo mat, or clean window screen
- A warm, dry location with good airflow
- Cheesecloth or a thin cotton cloth to cover (protects from dust and insects)
Step-by-step:
- Wash the freshly harvested calyces gently under cold water and pat completely dry with a clean kitchen towel — no surface moisture before drying
- Lay the calyces in a single layer on your drying rack with space between each one — they must not touch or overlap
- Place in a warm, well-ventilated spot away from direct sunlight (direct sun bleaches the color and degrades the anthocyanins)
- Cover loosely with cheesecloth to protect from dust
- Turn the calyces once daily for even drying
- Check for dryness after 3–5 days depending on humidity and temperature
Ready when: The calyces feel completely dry and slightly brittle to the touch with no flexibility remaining. They should snap or crumble rather than bend.
Drying time: 3–7 days depending on humidity. In very humid climates, air drying is not recommended — use the oven or dehydrator method instead to prevent mold.
Method 2: Oven Drying (Fastest Home Method)
Oven drying is the fastest method available without specialized equipment and produces consistently good results when done at the correct temperature.
Best for: Larger batches · humid climates where air drying risks mold · when you need dried hibiscus quickly
The critical rule: low and slow. High oven temperatures destroy the anthocyanins and volatile compounds that give hibiscus tea its color, flavor, and health benefits. The goal is to remove moisture, not to cook the calyces.
What you need:
- Fresh hibiscus calyces
- Baking sheet lined with parchment paper
- Oven with a low temperature setting
Step-by-step:
- Preheat your oven to 50–60°C (120–140°F) — the lowest setting on most ovens. If your oven’s lowest setting is 80°C (175°F), prop the door open slightly with a wooden spoon to allow moisture to escape and reduce the effective temperature
- Wash calyces and pat completely dry
- Arrange in a single layer on the parchment-lined baking sheet, cut-side up, with space between each piece
- Place in the oven on the middle rack
- Check every 30–45 minutes and turn the calyces over once halfway through
- Begin checking for dryness at the 2-hour mark
Ready when: Same test as air drying — completely dry, slightly brittle, no flexibility. The color should remain deep red to dark burgundy, not brown. If they are turning brown, your temperature is too high.
Drying time: 2–4 hours at 50–60°C
Troubleshooting:
- Browning calyces → temperature too high, reduce or prop door open
- Still flexible after 4 hours → cut the larger calyces in half and continue
- Uneven drying → rotate the tray and turn calyces more frequently
Method 3: Food Dehydrator (Best Results)
A food dehydrator is the ideal tool for drying hibiscus at home — consistent low heat, excellent airflow, and precise temperature control produce the highest quality dried calyces with maximum color and flavor preservation.
Best for: Regular harvesters · large batches · people who also dry herbs, fruit, or other botanicals
Step-by-step:
- Wash calyces and pat completely dry
- Arrange in a single layer on the dehydrator trays — do not overlap
- Set the dehydrator to 52–57°C (125–135°F) — the “herb” or “flower” setting on most models
- Run for 4–6 hours, checking every 2 hours
- Rotate trays if your dehydrator has uneven airflow
- Test for dryness using the snap test
Drying time: 4–8 hours depending on calyx size and moisture content
Advantage over oven: No need to monitor as closely, more consistent results, better airflow means faster and more even drying.
How to Tell When Hibiscus Calyces Are Fully Dry
This is the most important quality check in the entire process. Incompletely dried hibiscus will mold in storage within days — wasting your entire batch.
The snap test: Pick up a dried calyx and try to bend it between two fingers. A properly dried calyx should:
- Feel crisp and slightly brittle
- Snap or crack rather than bend
- Show no soft or flexible spots
- Sound slightly crunchy when pressed
Visual check: Deep red to dark burgundy color throughout. No soft spots, no translucency, no pale or wet-looking patches.
Weight check: Hibiscus calyces lose approximately 80–85% of their weight during drying. A batch that started at 500g should finish at approximately 75–100g of dried calyces.
If in doubt, dry longer. An extra hour in the oven or dehydrator never hurts finished hibiscus. Insufficient drying ruins the entire batch.
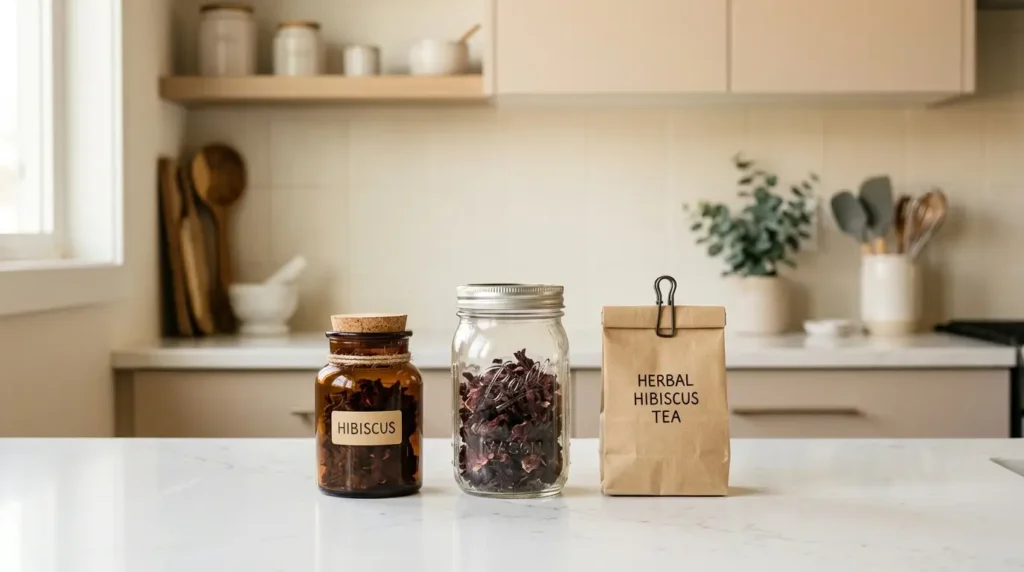
Storage: How to Keep Dried Hibiscus Fresh
Proper storage is what separates a 3-month shelf life from an 18-month one. The enemies of dried hibiscus are moisture, light, heat, and oxygen — avoid all four.
Best containers:
- Amber glass jar with airtight lid — best option. Amber glass blocks UV light that degrades anthocyanins. Completely airtight prevents moisture reabsorption
- Clear glass mason jar — good option if stored in a dark cupboard away from light
- Kraft paper bag sealed airtight — acceptable for short-term storage (1–3 months). Not ideal long-term as paper is slightly moisture-permeable
Storage rules:
- Store in a cool, dark cupboard — away from the oven, stovetop, or any heat source
- Never store in the refrigerator — temperature fluctuation causes condensation inside the container, which introduces moisture
- Do not use plastic bags long-term — they are not sufficiently airtight
- Label with the drying date so you know when to replace
Shelf life:
- Properly dried and stored: 12–18 months with good flavor and color
- After 18 months: still safe to use but flavor and antioxidant potency begin to decline noticeably
How to check if stored hibiscus has gone bad:
- Musty or fermented smell → discard immediately (mold)
- Significant color loss (pale pink instead of deep red) → past its best, still usable but weaker
- Visible mold on any calyx → discard entire batch
How to Make Hibiscus Tea From Your Dried Calyces
Once you have your dried hibiscus, the process is simple. The full traditional recipe with serving variations is in our agua de jamaica guide, but here are the essentials:
Standard hot brew:
- 1–2 teaspoons of dried hibiscus calyces per 240ml (8 oz) of water
- Steep in near-boiling water (90°C / 195°F) for 5–10 minutes
- Strain, sweeten to taste, serve hot or over ice
Cold brew (lower acidity, smoother flavor):
- 2–3 tablespoons of dried calyces per 1 liter of cold water
- Refrigerate for 8–12 hours
- Strain and serve over ice
Cold brew is particularly recommended for people who are sensitive to acidity — the cold extraction process results in a higher-pH drink that is gentler on the stomach. For a full explanation of why, see our guide on is hibiscus tea acidic or alkaline. For recipe variations including cold brew herbal combinations, our cold brew herbal tea recipes guide has a full collection.
How much to use per day: Our guide on how much hibiscus tea per day covers the recommended daily amount for different health goals and populations.
Homemade vs. Store-Bought Dried Hibiscus: Is It Worth It?
If you have access to fresh hibiscus calyces — whether from your own garden, a farmers market, or a specialty store — drying them at home offers several advantages:
Quality: You control the drying temperature and time, ensuring maximum anthocyanin and antioxidant preservation. Commercial drying is often done at higher temperatures for speed, which degrades color and potency.
Freshness: Store-bought dried hibiscus may have been sitting in a warehouse for months before reaching you. Homemade dried hibiscus goes from fresh to stored in hours.
Flavor: Freshly dried hibiscus has a brighter, more complex flavor than most commercial products — more fruit-forward, less dusty or flat.
Cost: Fresh hibiscus calyces in season are significantly cheaper per gram than pre-dried commercial versions, especially organic dried hibiscus.
The full spectrum of hibiscus tea benefits is most accessible from high-quality, properly dried calyces — whether homemade or from a reputable supplier.
Safety and Precautions
Before making hibiscus tea from homemade dried flowers, a few important notes:
Variety confirmation: Only Hibiscus sabdariffa (roselle) is used for tea. Ornamental varieties are not toxic but are not what you want for flavor or benefits.
No pesticides: If you grow your own hibiscus or source from a garden, ensure no pesticides or chemical fertilizers have been applied in the weeks before harvest.
Medication interactions: Hibiscus tea has meaningful interactions with blood pressure medication, antimalarials, and immunosuppressants. Our guide on hibiscus tea side effects covers this in full before you begin regular consumption.
Acid reflux: If you have GERD or a sensitive stomach, start with cold brew and read our guide on hibiscus tea and acid reflux before drinking regularly.
Frequently Asked Questions
How do you dry hibiscus flowers for tea? Wash the freshly harvested calyces, pat dry, and use one of three methods: air drying on a mesh rack for 3–7 days, oven drying at 50–60°C for 2–4 hours, or food dehydrator at 52–57°C for 4–8 hours. The calyces are ready when they snap rather than bend.
Which part of the hibiscus plant do you use for tea? The calyx — the fleshy, dark-red cup-shaped structure at the base of the flower — not the petals. The calyx contains the anthocyanins, organic acids, and antioxidants that give hibiscus tea its color, flavor, and health benefits.
Can you dry hibiscus flowers in the sun? Direct sunlight is not recommended — UV exposure degrades the anthocyanins responsible for the deep red color and health benefits. Dry in a warm, well-ventilated spot away from direct sun, or use the oven or dehydrator method.
How long does it take to dry hibiscus calyces? Air drying takes 3–7 days. Oven drying at 50–60°C takes 2–4 hours. A food dehydrator takes 4–8 hours. Drying time varies depending on the size of the calyces and the humidity of your environment.
How do you know when dried hibiscus is ready? The snap test: a properly dried calyx should snap or crack rather than bend. It should feel completely dry and slightly brittle with no soft spots. The color should remain deep red to dark burgundy — browning indicates the temperature was too high.
How long do dried hibiscus flowers last? Properly dried and stored in an airtight container away from light and heat, dried hibiscus calyces stay fresh for 12–18 months. After 18 months, flavor and antioxidant potency begin to decline but the tea remains safe to drink.
Can you use hibiscus petals instead of calyces for tea? Hibiscus petals are edible and have a mild flavor, but they do not produce the same deep red color, tartness, or health benefits as the calyces. For authentic hibiscus tea, always use the calyces.
What variety of hibiscus do you use for tea? Hibiscus sabdariffa — also called roselle — is the variety used for tea. Common ornamental garden hibiscus (Hibiscus rosa-sinensis) is not toxic but is not used for traditional hibiscus tea.
Key Takeaways
- How to dry hibiscus flowers for tea involves three methods: air drying (3–7 days), oven drying (2–4 hours at 50°C), or food dehydrator (4–8 hours at 52–57°C)
- Always dry the calyx — the fleshy red cup at the base of the flower — not the petals
- Use only Hibiscus sabdariffa (roselle) for tea, not ornamental hibiscus varieties
- The snap test confirms readiness — dried calyces should crack rather than bend
- Store in an airtight amber glass jar away from light, heat, and moisture for 12–18 months shelf life
- Never store in the refrigerator — condensation introduces moisture and causes mold
- Homemade dried hibiscus has better flavor and higher antioxidant content than most commercial products
- Low temperature is critical during drying — high heat destroys the anthocyanins responsible for color and health benefits